ONLINE ORDERing FOR OUR 2022 GARLIC CROP WILL OPEN ON SATURDAY SEPTEMBER 24TH AT NOON. ORDERS WILL SHIP IN THE ORDER RECEIVED.
Planting & Care

Amendments & Fertilizers applied prior to planting…
Before Planting
Ensure a successful garlic crop by preparing your planting area well in advance to reduce weed pressure and increase soil organic matter. This includes starting with a soil test and amending as recommended for garlic/allium crops. We also recommend a minimum of three-year crop rotation with no allium crops (onions, shallots, garlic, etc) in the prior two years. If you receive your garlic before you are ready to plant, store in a dry location with a temperature range between 50-60 degrees. The day before planting separate cloves, keeping the largest for planting and smaller cloves for green garlic planting, eating or processing into powder. PLANT THE BEST AND EAT THE REST! If you want to pre-treat with fertilizer and/or sterilizer, now is the time to do so. We have detailed preplanting soak recommendations on our YouTube channel: The Garlic Grower
Let’s Plant!
Plant four to six weeks before your ground typically freezes for the winter. In Northern Vermont we target the Oct 10th-Nov 1st. When we grew in SE PA our target planting dates were the last week of October and the first half of November but it will be different depending on where you live. Ideally you want the cloves to achieve good root growth & establishment before the ground freezes with a minimum of top growth. Plant 2"-3" deep with at least 1" of soil covering the clove with the "point" of the clove up. Plant no closer than a 6"x6" grid pattern and no more than four rows per bed. While more space between cloves will often yield larger bulbs they often don't store as well. We recommend mulching with 2"-3" of CHOPPED leaves. DO NOT use leaves unless you chop them first!! We STRONGLY recommend that you DO NOT mulch with straw or grain crops, which is a common mulch in garlic production. Grain crops, especially wheat straw are host for mites which are a garlic pest post harvest and can decimate your crop during curing and storage. We no longer mulch our crop, other than the weed barriers used in row. When finished planting we recommend you rest for the winter....just like the garlic you planted!

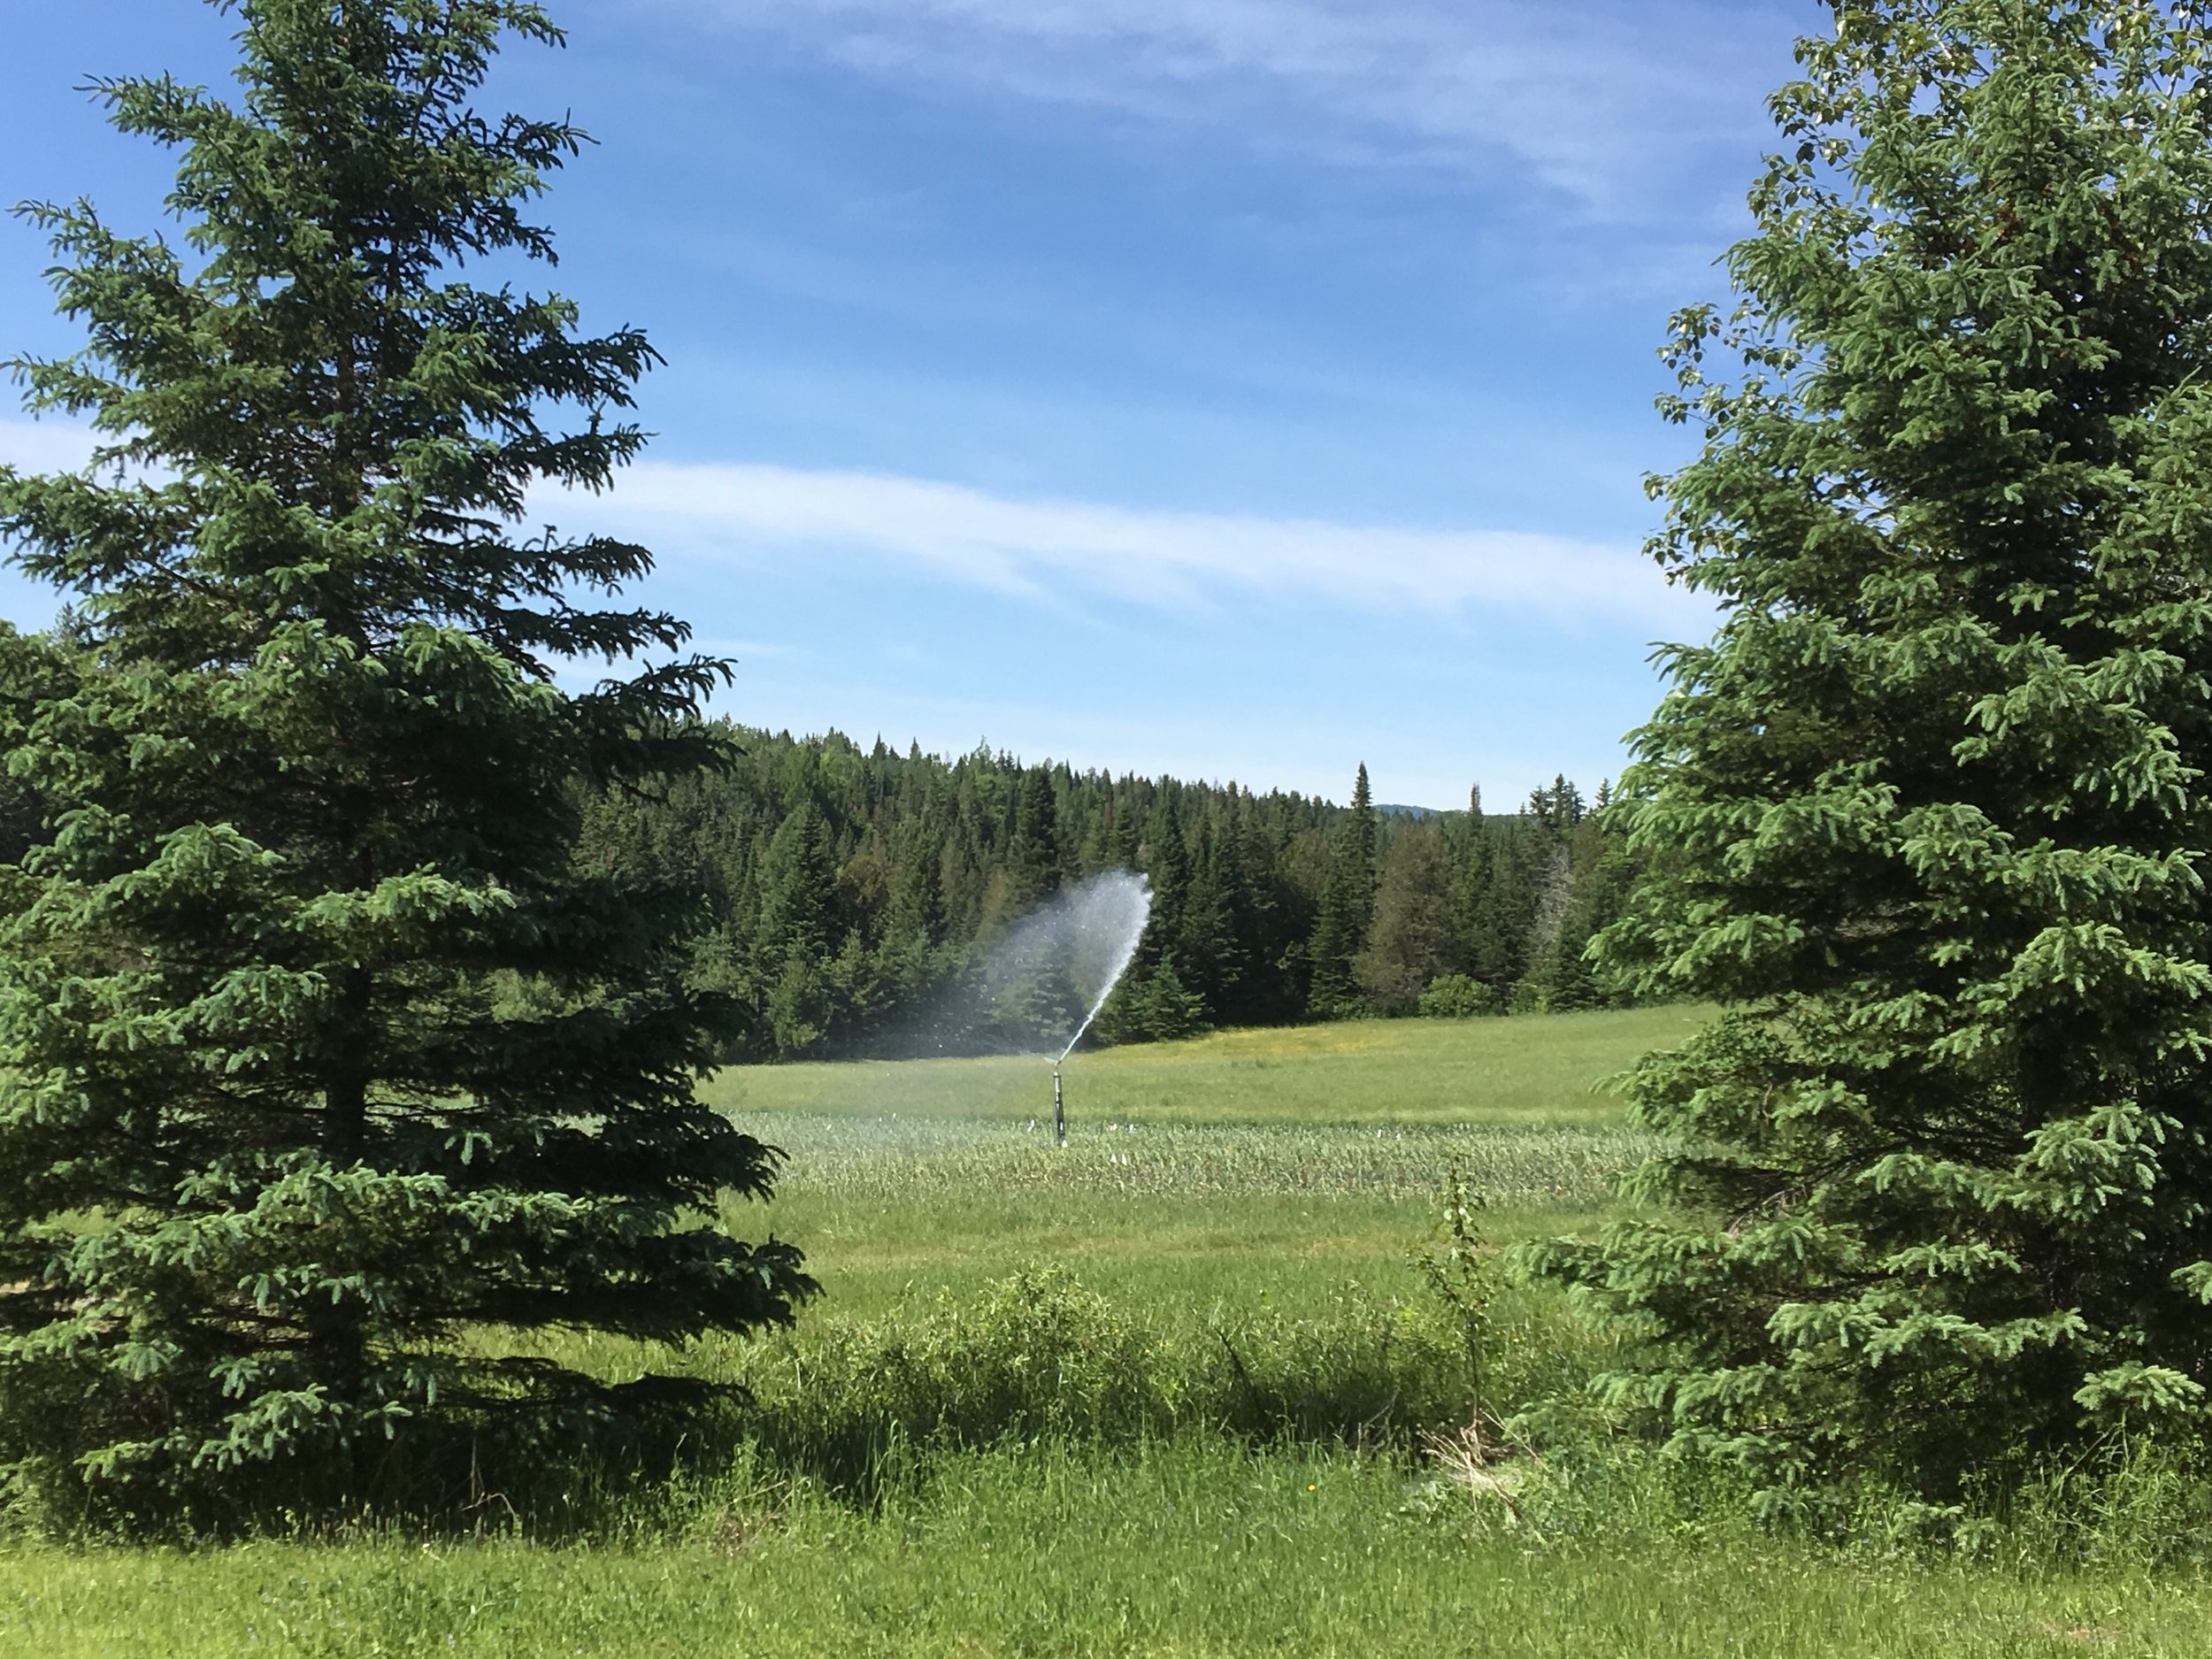
Garlic needs water, but not too much, about 1” per week so be prepared to irrigate in dry conditions…
Care & Maintenance
Enjoy the winter months but come spring there's work to be done. Garlic is one of the first plants to wake up in spring. As soon as you have a few inches of top growth you'll want to start foliar feeding and continue every two weeks until you see scapes starting to emerge. Weed immediately before you foliar feed every two weeks. You'll appreciate clean garlic beds come harvest. If you are receiving less than 1" of rainfall per week irrigate accordingly but only up until when you cut scapes. After "scaping" do not water and cross your fingers for dry weather through harvest in 3- 6 weeks. If you live in an area impacted by Allium Leaf Miner (SE PA and surrounding areas) we'd encourage you to cover your garlic from late March to late May with insect netting.
Scapes - WHAT?
Scapes??? Late in May or early June, depending on variety and your location you'll notice this "stalk" growing from the center of your garlic plant. If allowed to grow, in most hardneck varieties, it will form a coil (almost Dr Seuss like) and if allowed to remain long enough will eventually straighten and become rigid/tough. We recommend cutting the scape as soon as it begins to form a curve and form a coil. Remove by cutting where it emerges from the top of the leaves or snap off between your fingers. Allowing the scape to remain on the plant will redirect energy from bulb to the scape and reduce bulb size. Scapes have a milder garlic flavor and a number of culinary uses such as pesto, pickled scapes and more. More than just a culinary treat, scapes also indicate a change in the attitude of the garlic and how you manage the plant. When scapes begin to emerge that's a sign to stop your foliar feeding and fertilization program. If you continue it will impact the storage quality of your crop. Once you remove the scapes then its time to stop watering until harvest time. Hopefully Mother Nature will cooperate as well but regardless of what she decides no further irrigating after you remove scapes. You're almost ready to harvest some garlic!

Harvest dates will vary from year to year but when it’s time, it’s time! Better to be a little early than late.
Time to Harvest!
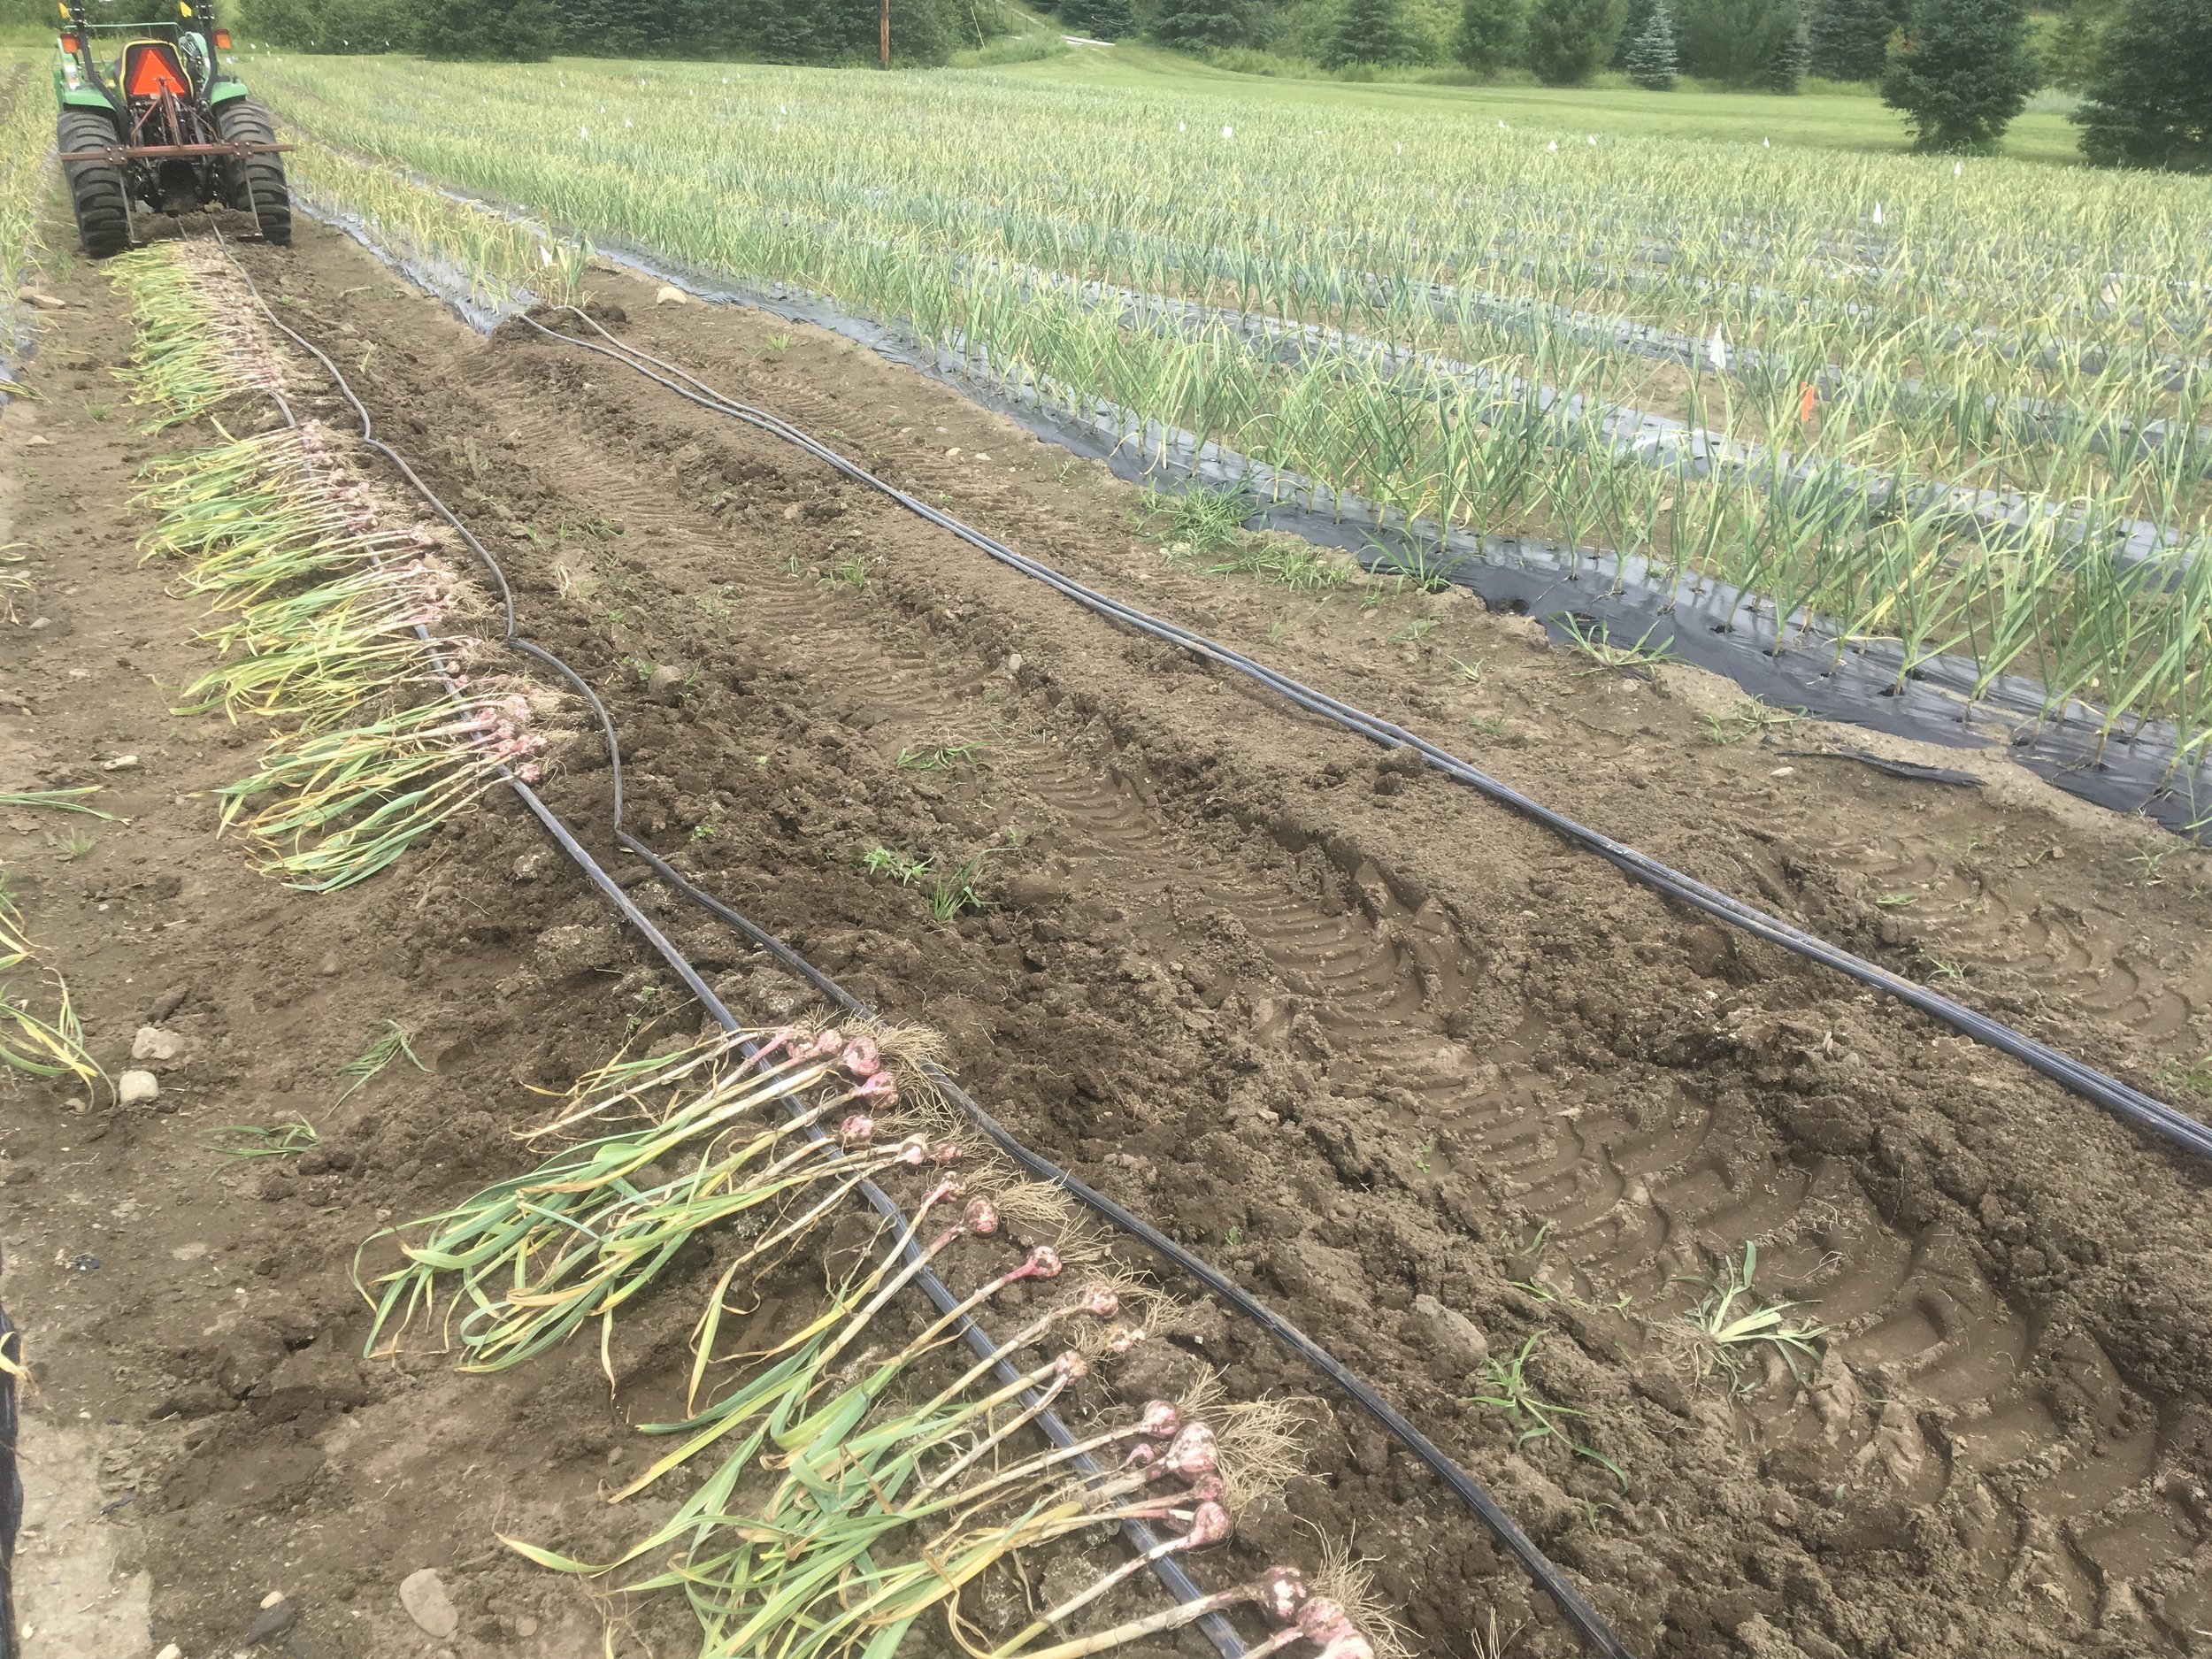
All hardneck varieties mature at a different rate and will be ready to harvest at slightly different times, usually 3-6 weeks after scaping. Harvest too early and it impacts bulb size. Harvest too late and it impacts overall quality and storability. Therefore it’s better to harvest too soon than too late. Your signal to harvest for most varieties (except Asiatic subgroup) is when the leaves on the bottom of the plant begin to "die down" and turn brown. HARVEST when you have 6-7 GREEN leaves REMAINING on the plant. Each leaf represents a "wrapper" on the bulb and you want enough wrappers to protect the cloves during curing, cleaning & storage. Asiatic varieties have a tendency to "bulb split" if allowed to remain too long. We recommend harvesting Asiatic varieties ONLY as soon as the first leaves begin to die down. Use a digging fork to loosen the soil, grab at the base of the plant and lightly pull to remove. If the bulb does not remove easily dig some more, don't pull harder as you are likely to damage the bulb by pulling the stem out. Lightly brush any excess soil from bulb and roots. DO NOT bang the bulb against the ground, it will bruise the cloves. DO NOT allow your garlic plants to be exposed to direct sunlight after harvest, quickly move to a shaded structure.
Curing, Cleaning & Storage
Time to cure your garlic. If your garlic is going to store well its critical that you cure it properly. You don't need anything fancy to accomplish this but you do need a shaded structure out of the elements, with good air circulation and low humidity (weather dependent).
We recommend hanging your garlic in bundles of 8-12 depending on stalk size. We utilize fans to improve air circulation. Other than brushing off loose soil from the bulb at time of harvest we don't clean until curing is complete. Curing time will depend on your weather, where your curing (garage, porch, etc) and a number of other factors but plan on 4 weeks until dry. If you cut the stem 2" above the bulb and its still wet, then you need more time. Once dry we start by trimming the roots leaving less than a 1/4" then trimming the stem to 2" above the bulb. Now its time to clean and grade. Remove the outer most wrapper or two until the bulb is clean of dirt & debris. Check the bulb for damaged cloves, missing stems, etc. Set aside any damaged bulbs for immediate use or processing. Select your best bulbs for replanting in the fall, typically between 2"-2.5", with large well formed cloves. Mis-formed bulbs, uneven clove size, or flatted sided bulbs should be eaten, not planted. Remember, PLANT THE BEST and EAT THE REST! Store your bulbs in a dry, dark location between 50-60 degrees until ready to eat or plant.

Early Turban variety “test digs” to determine ideal harvest window.